1.设置分析类型
(1)激活静力学分析
GUI:Main Menu→Solution→Analysis Type→New Analysis,弹出如图1-14所示的“分析类型”设置面板,选择“Static”选项,单击“OK”按钮。
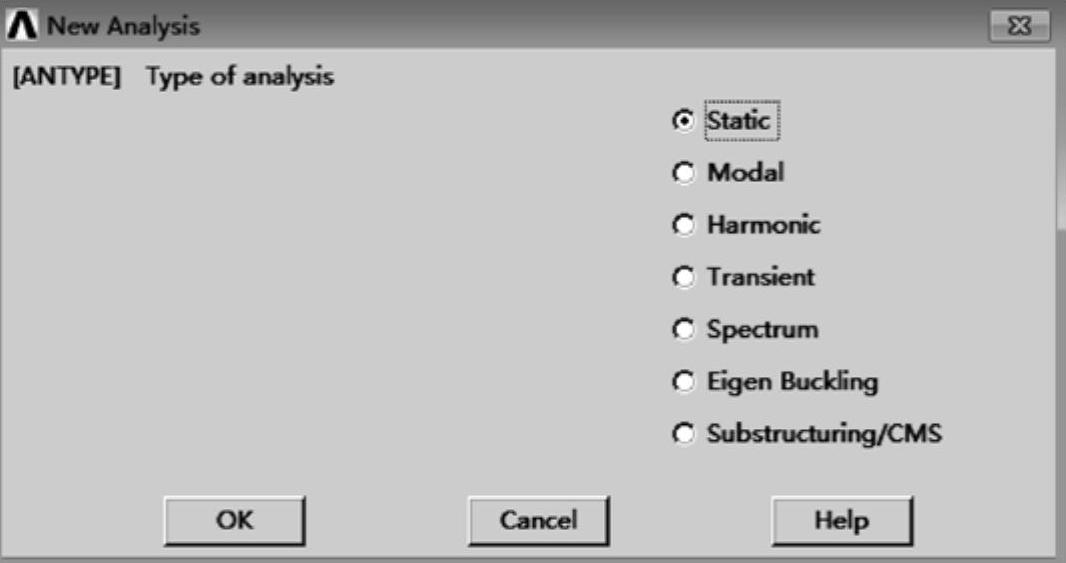
图1-14 “分析类型”设置面板
(2)设置分析选项
GUI:Main Menu→Preprocessor→Loads→Analysis Type→Analysis Options,弹出如图1-15所示的“静态分析选项”设置面板,勾选“Large deform effects”复选框,激活大变形分析,其他设置选择默认设置,单击“OK”按钮。
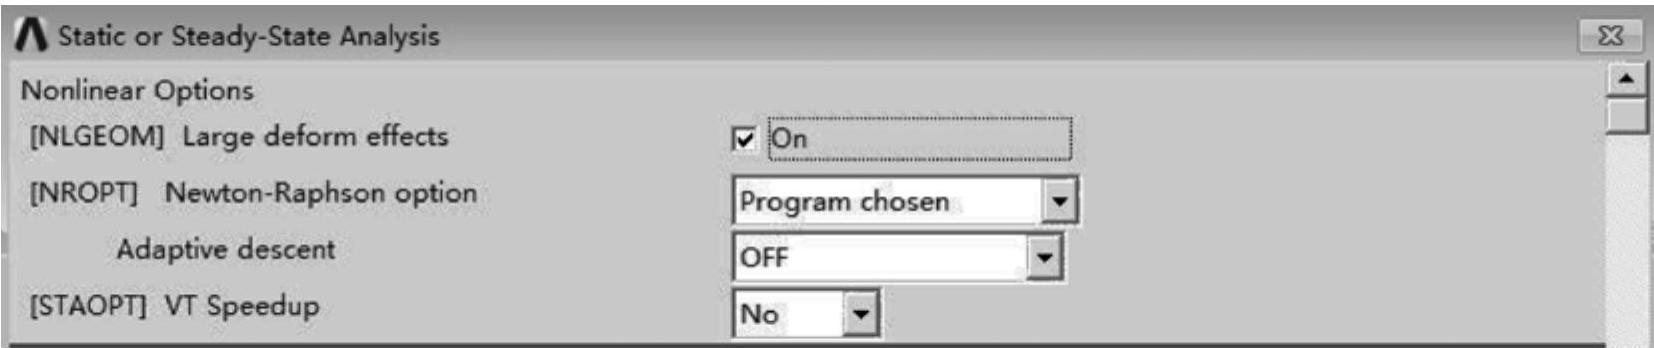
图1-15 “静态分析选项”设置面板
2.定义边界条件
GUI:Main Menu→Solution→Define Loads→Apply→Structural→Displacement→On Lines,弹出拾取对话框,拾取线L5,L8,L13和L6,单击“OK”按钮,弹出图1-16所示的“在线上施加约束”面板,选择约束类型为“ALL”,单击“OK”按钮。
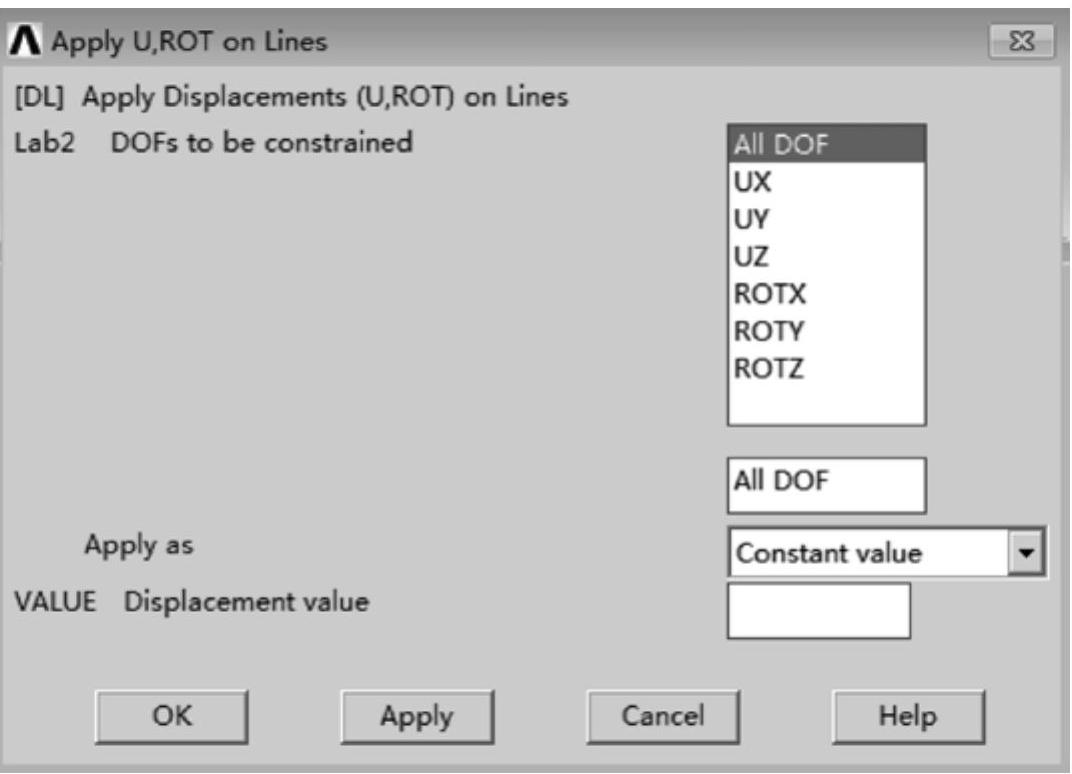
图1-16 “在线上施加约束”面板
3.写入第一个载荷文件
(1)定义载荷
GUI:Main Menu→Solution→Define Loads→Apply→Structural→Pressure→On Areas,弹出拾取对话框,拾取面4,单击“OK”按钮,弹出如图1-17所示的“在面上施加压力”设置面板,设置“Load PRES value”为“10E6”,“Load key usually face no”为“1”,单击“OK”按钮。
(2)输出控制
GUI:Main Menu→Solution→Load Step Opts→Output Ctrls→DB/Results File,弹出图1-18所示的“计算结果输出”控制面板,选择“Every substep”选项,单击“OK”按钮。
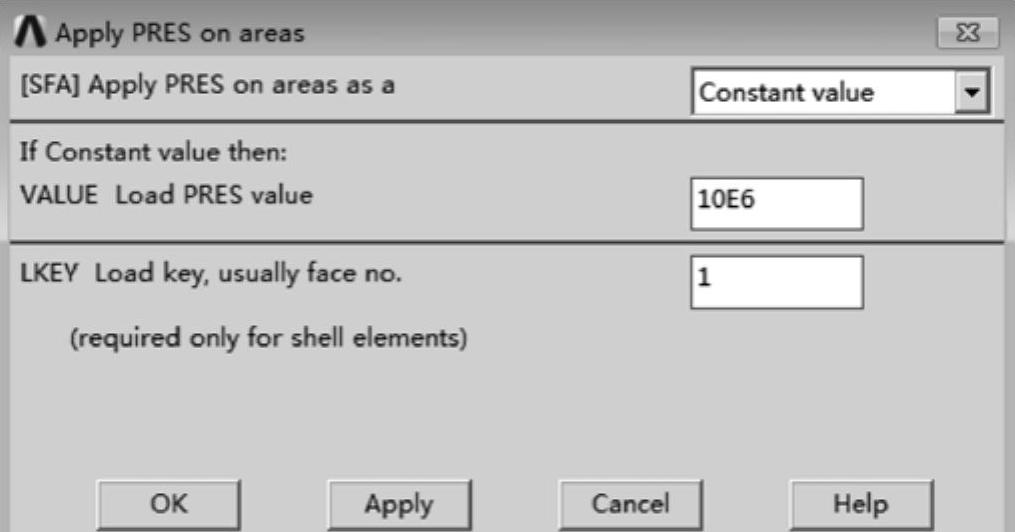
图1-17 “在面上施加压力”设置面板
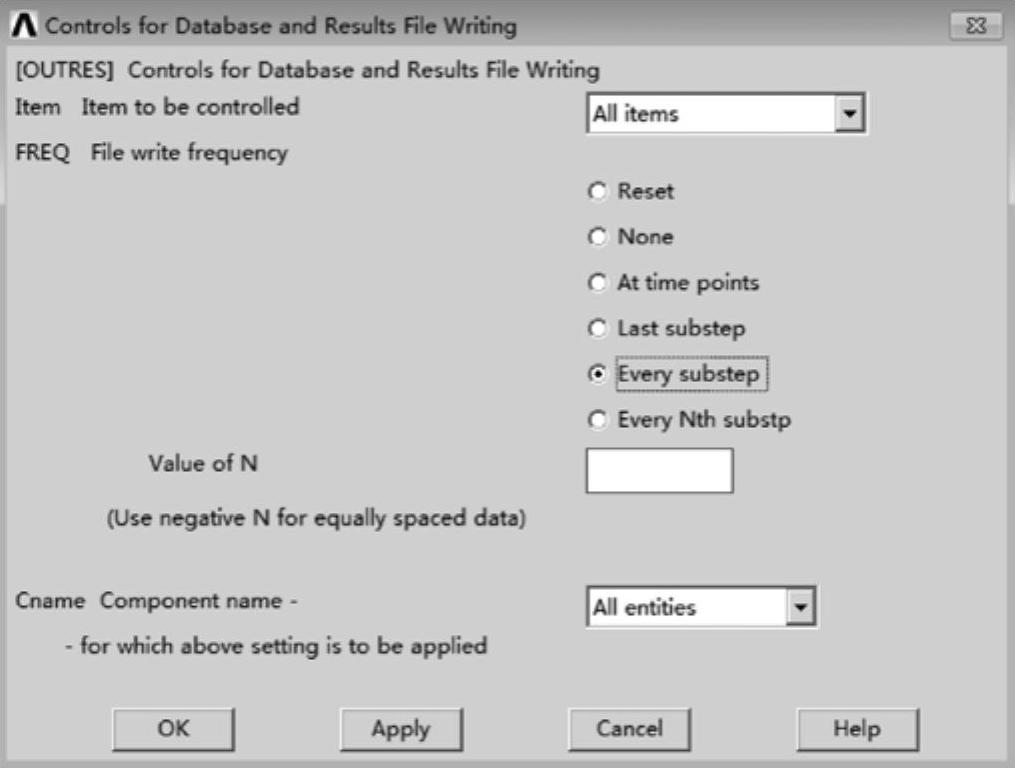
图1-18 “计算结果输出”控制面
(3)设置计算时间和子步
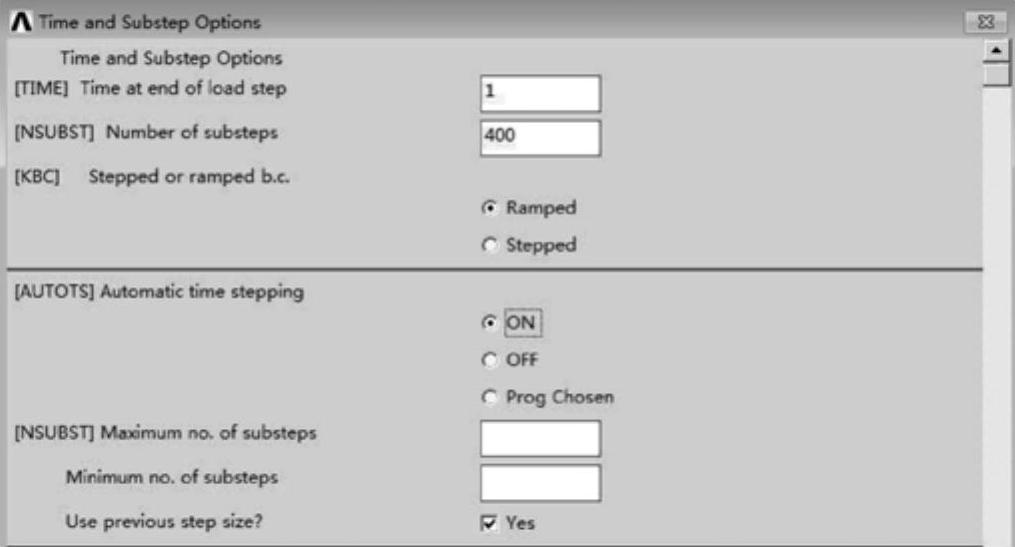
GUI:Main Menu→Solution→Load Step Opts→Time/Frequence→Time and Substeps,弹出如图1-19所示的“时间和子步选项”设置面板,“Time at end of Load Step”设为“1”,“Number of substeps”设为“400”,“Stepped or ramped b.c”选择“Ramped”选项,“Automatic time stepping”设为“ON”,其他保持默认设置,单击“OK”按钮。
 (www.daowen.com)
图1-19 “时间和子步选项”设置面板
(4)写入载荷步
GUI:Main Menu→Solution→Load Step Opts→Write LS File,弹出如图1-20所示的“写入载荷步文件”面板,“Load step file number n”设为“1”,单击“OK”按钮。
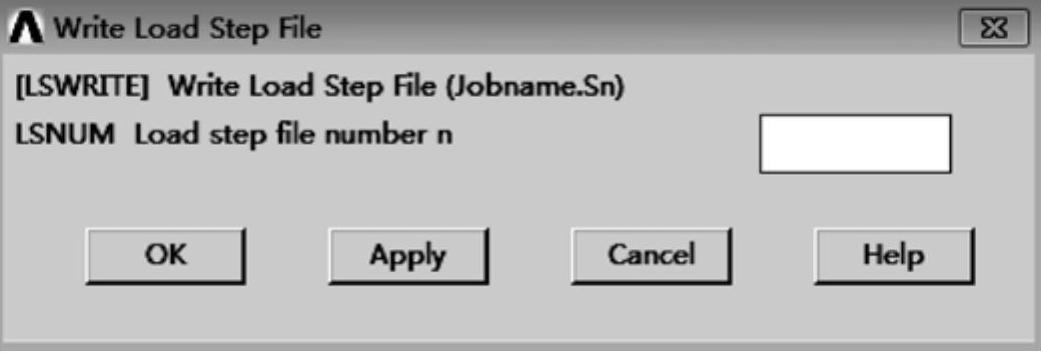
图1-20 “写入载荷步文件”面板
4.写入第二个载荷文件
(1)定义载荷
GUI:Main Menu→Solution→Define Loads→Apply→Structural→Pressure→On Areas,弹出“拾取”对话框,拾取面4,单击“OK”按钮,弹出如图1-17所示的“在面上施加压力”设置面板,“Load PRES value”设为“0”,“Load key usually face no”设为“1”,单击“OK”按钮。
(2)设置计算时间和子步
GUI:Main Menu→Solution→Load Step Opts→Time/Frequence→Time and Substeps,弹出如图1-19所示的“时间和子步选项”设置面板,“Time at end of load step”设为“2”,“Number of substeps”设为“200”,“Stepped or ramped b.c”选择“Stepped”,“Automatic time stepping”选择“ON”,其他保持默认设置,单击“OK”按钮。
(3)写入载荷步
GUI:Main Menu→Solution→Load Step Opts→Write LS File,弹出如图1-20所示的“写入载荷步文件”面板,“Load step file number n”设为“2”,单击“OK”按钮。
5.写入第三个载荷文件
(1)定义载荷
GUI:Main Menu→Solution→Define Loads→Apply→Structural→Pressure→On Areas,弹出“拾取”对话框,拾取面4,单击“OK”按钮,弹出如图1-17所示的“在面上施加压力”设置面板,“Load PRES value”设为“10E6”,“Load key usually face no”设为“1”,单击“OK”按钮。
(2)设置计算时间和子步
GUI:Main Menu→Solution→Load Step Opts→Time/Frequence→Time and Substeps,弹出如图1-19所示的“时间和子步选项”设置面板,“Time at end of load step”设为“3”,“Number of substeps”设为“600”,“Stepped or ramped b.c”选择“Ramped”,“Automatic time stepping”选择“ON”,其他保持默认设置,单击“OK”按钮。
(3)写入载荷步
GUI:Main Menu→Solution→Load Step Opts→Write LS File,弹出如图1-20所示的“写入载荷步文件”面板,“Load Step file number n”设为“3”,单击“OK”按钮。
6.求解
GUI:Main Menu→Solution→Solve→From LS Files,弹出如图1-21所示的“通过载荷步求解”设置面板,“Starting LS file number”设为“1”,“Ending LS file number”设为“3”,“File number in crement”设为“1”,单击“OK”按钮。
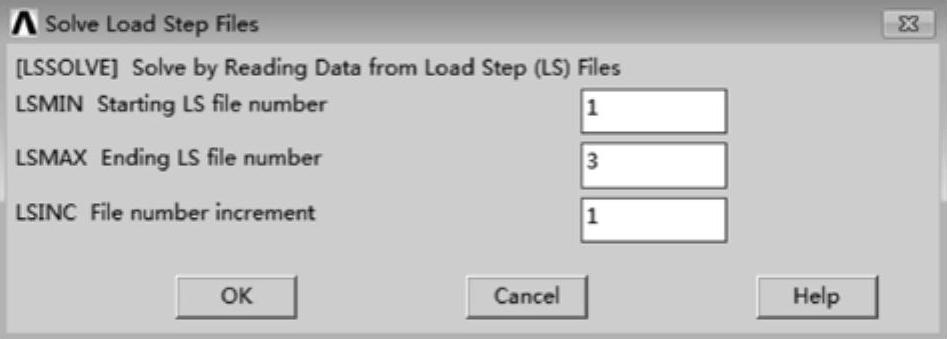
图1-21 “通过载荷步求解”设置面板
免责声明:以上内容源自网络,版权归原作者所有,如有侵犯您的原创版权请告知,我们将尽快删除相关内容。